*** 5 minute read – if you don’t have time right now to read, bookmark this page and see you later***
Non-styled post – candid cake shots galore: It takes me around half a day to plan, research, write and edit a post. This one took 30 minutes to write, and what do you know, I really enjoyed it. Expect more of these convivial, candid posts in 2020.
How often do you bake? I don’t bake as often as I’d like. I am a part of a book and cake club (it really is the best group in the entire world), where we meet once a month to chat about books and cake.
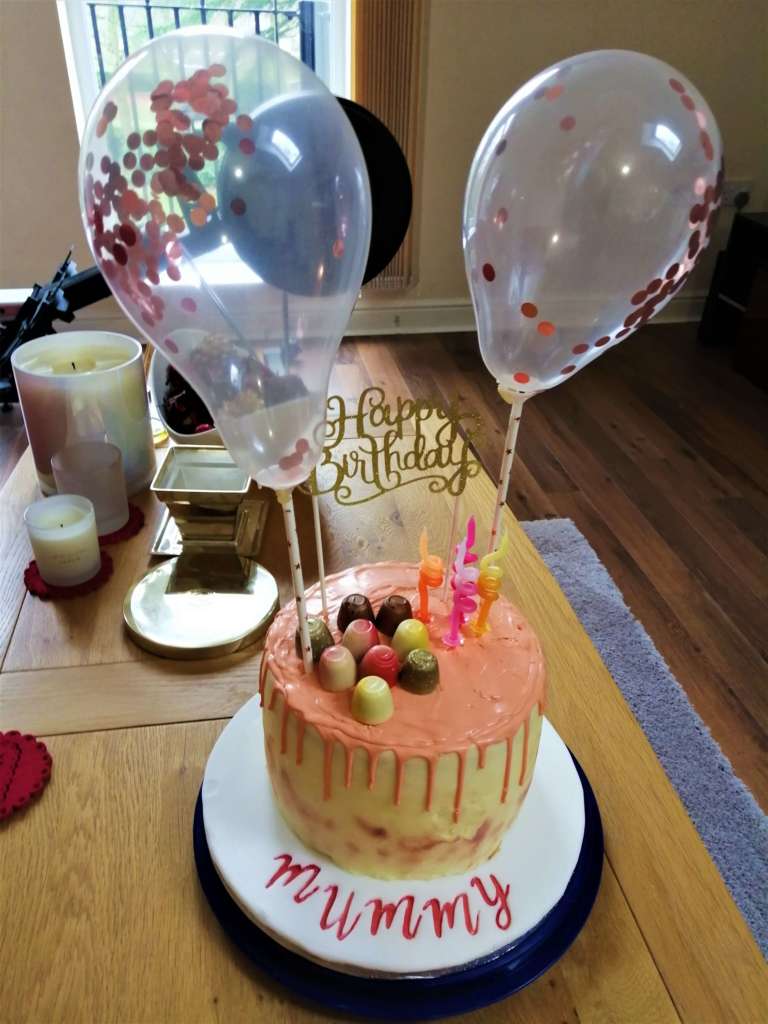
Here is a candid cake shot of my first drip cake. This is literally the only photo I took, because I was rushing around, had to get ready and was up till 2am with the icing. Here it is, in nearly its full glory. (I had forgotten to place mini macarons on the top, but it looked great and tasted really, really good.)

Being a member of the book and cake club means that I bake a minimum of once a month. I try to bake more, but time is of the (vanilla) essence these days as I juggle The Day Job, my writing fiction and food.
I’d say I’m a hobby baker, because baking calms me, and soothes my soul. It comes naturally to me, and I barely have to engage my brain-cells. I remember when a friend came around to visit and we were sitting in the lounge chatting. I asked if she wanted cake, she said yes, I explained I’d bake one, and we carried on chatting. Within 30 minutes, a cake was ready to come out of the oven (I had chatted whilst baking). She still reminds me to this day, how “You’d baked a cake, just like that, whilst chatting, and I hadn’t even realised”.
Last week, I had a more hands-on, special project to do – a birthday cake for a very special lady. I offered to bake her cake, because I wanted it to be a gift that means something. You can’t get more personal than someone cooking for you, because a little part of your soul goes into the dish you’re making.
I had a brief idea of what sort of cake to bake, but then I got sucked into Pinterest and Instagram. Did you know the hashtag #DripCake has over 1.3million hashtags? I had settled on a drip cake, and after spending a few weeks’ researching, I ordered ingredients and decorations from the Internet.
Sugar and Crumbs has been my go-to resource for cake ingredients, and because it was their sale, I must admit to going a little crazy and placing a giant order.
I have used Sugar and Crumbs before and love their range of icing sugars. Personal favourites are their salted caramel and raspberry ripple flavours. I have yet to try the thousand other flavours I bought, but I can personally recommend these two flavours.
The birthday cake was supposed to be a 4-layer drip cake, but by the time I got to layering the third sponge, it was already towering way too tall. In the end, I cling wrapped 1 layer as a spare and put it int the fridge for later in the week. It was an 8-egg sponge, so next time, I’ll use 7 eggs for a 3-layer cake.
I had the option of using the flavoured icing sugars in the sponge, but the flavours are more pronounced if used in buttercream.
I settled for a vanilla sponge mix and vanilla flavour for the crumb coat. The bottom layer of the cake would be lemon drizzle icing and lemon curd filling. The top layer would be raspberry ripple icing and raspberry jam filling. Here is the recipe that I used.
RECIPE
Ingredients for sponge:
- 7 eggs – note the weight of the eggs in the shells and weigh the EXACT amount of self-raising flour, margarine and caster sugar
- ½ teaspoon baking powder
- 2 tablespoons vanilla extract
Ingredients for buttercream:
- 500g salted butter (2x250g butter blocks) at room temperature
- 1 teaspoon vanilla paste
- Double the quantity of icing sugar. Here, it would be 1kg icing sugar.
Fondant board:
- 12inch cake board
- Ready to roll fondant block (300g)
- Coral liquid food dye
To Do:
- Line and grease 3x 8inch tins
- Sieve the flour and baking powder together
- Lightly beat the eggs
- Pre-heat oven to 170C
Method for sponge:
- Make the sponge first. You can make the buttercream whilst your sponges are baking.
- For the sponge, you can throw everything into a mixer and beat for a few minutes until well combined, for the all-in-one method. I personally prefer the creaming method, because I find that yields a lighter sponge, so I beat the margarine and sugar with the paddle attachment in my KitchenAid, for around 3 minutes until the mixture turned pale and fluffy. The margarine literally changes colour, and turns a whiter shade of pale, so keep beating the margarine sugar mixture if it hasn’t changed colour.
- I then alternated additions of eggs and sieved flour to avoid curdling. Don’t worry if it does curdle, it’s not the end of the world. Just add a tablespoon of flour and beat till the curdling disappears.
- Divide the mixture into the three tins, give a gentle tap to dispel any air bubbles and throw into the oven for around 20 – 25 minutes. The cakes should be golden brown and lightly springy to the touch.
- Remove cakes from the tins, place gently onto cooling racks until completely cooled. Cling-film these and place in the fridge for the day after.
Method for buttercream:
- Beat the butter for around 5 minutes with the paddle attachment. You’re looking for a pale, fluffy, beaten butter. Once nice and pale, add the vanilla; if you add from the outset, you won’t be able to tell if the butter has reached its pale stage.
- Continue beating the butter for a few seconds after the vanilla addition, then add the icing sugar in small increments. A few tablespoons at a time are perfect, to avoid icing sugar clouds (I keep the extractor fan on whenever I handle icing sugar).
For this cake, I needed 3 different flavours of buttercream (vanilla, lemon drizzle and raspberry ripple). So, I beat the heck out of the butter until light and pale, and divided it into 3; 300g for vanilla flavour, 100g for raspberry ripple, 100g for lemon drizzle.
The standard buttercream recipe ratio is always 2:1 icing sugar to butter i.e. double), so I used 600g plain icing sugar for the vanilla flavour, 200g raspberry ripple icing sugar and 200g lemon drizzle icing sugar. I would have loved to use my favourite Ermine buttercream for this cake, which is the silkiest, smoothest frosting ever. But because I needed the icing to firm up that would form the basis of the crumb coat, I used a more versatile recipe.
Method for crumb-coating:
- Bring the buttercream to room temperature by placing in a piping bag and massaging the plastic. The heat from your hands will gently warm the butter, this should take a minute.
- Put a blob of buttercream in the centre of an 8inch cake board to secure it. Start assembly of the cake, layering each sponge with the different flavours.
- I loathe anything Trumpian, but here you need to champion that mantra of ‘BUILD THAT WALL’. I piped a ring of buttercream along the circumference of the cake, to act as a wall so that the filling (lemon curd, or raspberry jam in this case) would not escape.
- Crumb coat the full 3 layered cake. Chill for 30 minutes. Coat with a second layer of buttercream. Use a flat-edged scraper for a clean edge. I used three layers of buttercream, as each one was quite thin.
- Nuke the drip bottle in 30 second increments. Drip away. It has a great set, so you need to work quickly.
- I used a few blogs of dripped chocolate to secure the other decorations (i.e. chocolate truffles).

Method for fondant board:
- Make this a few days’ before the birthday.
- Knead the fondant for a few minutes until soft. Heat from your hands will make it malleable quite quickly.
- Roll out to cover the board, cutting away the border with a sharp knife.
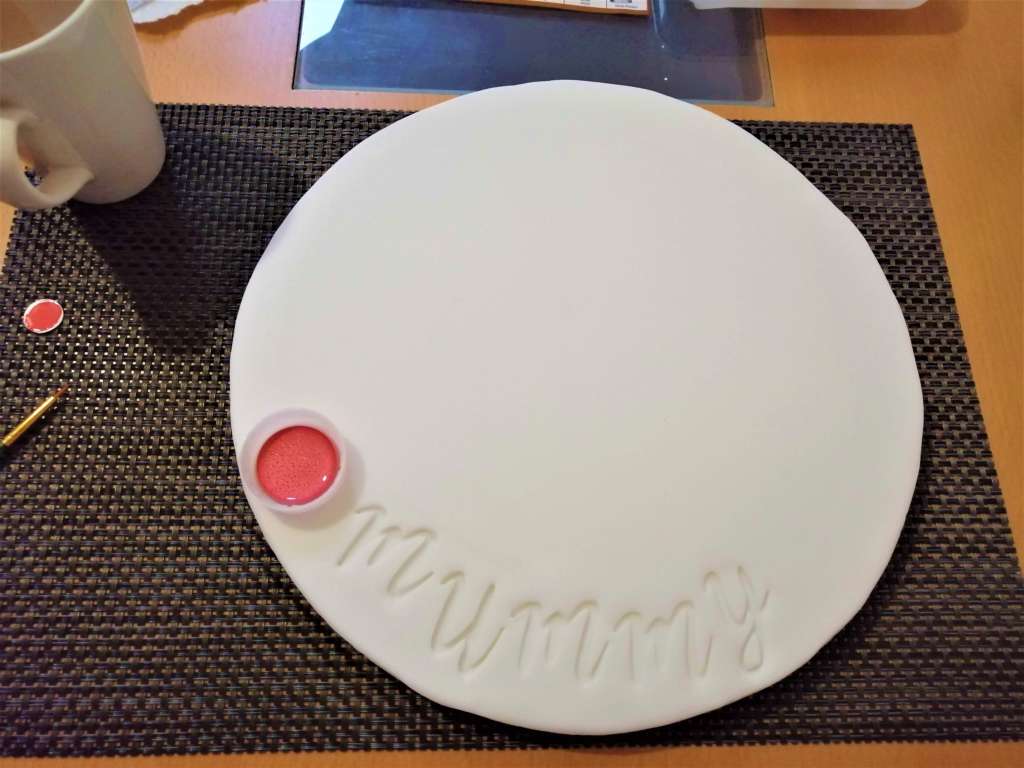
- Use a rolled-up piece of Scotch tape to lift the letters from the Sweet Stamp pad.
- Stamp the words you want onto the freshly rolled fondant.
- Gently extract the letters nestled in the fondant with a cocktail stick. Don’t use a knife, as the tip, no matter how sharp, is just too clunky. Plus, you might wind up damaging your precious letters, and because they cost a small packet, you really don’t want to do that.
- Use icing tools (the one that looks like a long pointy cotton bud) to make the surface inside the embossing more even if needed.
- Place the whole board in a box and let it harden overnight.

Just a few tips:
- Remove butter and eggs the night before you bake. You need these ingredients at room temperature to make the tastiest sponge known to man (or woman or dog or gerbil).
- Before starting the drip, take yourself to a corner, pat yourself on the back and say with intensity and a smile: “You can do this”. Because your very first drip cake is nothing short of terrifying. I was lucky in that I had the good sense to buy pre-made ganache in the bottle from Sugar and Crumbs, so that eliminated a tiny part of worry about the ganache texture (Is it the right consistency? What if it’s too runny? What if it splits?). Next time, I’ll definitely try home-made ganache.
- Bake your sponges a few days beforehand. It took me 3 days to bake and frost the cake, and I recommend taking your time, especially if it’s your first time.
- Chill the sponges in the fridge, to make sure they firm up a little. Yes, you want your sponge to be light as air inside, but this can render the sponge difficult to work with. If it’s been refrigerated, it will have a firmer texture and be easier to frost.
- Crumb-coat the sponges the day before. I had to ice my cakes three times, as the sponges were super light, and this took time (I was up till 2am the day before, as I wasn’t happy with the icing), but this was a learning curve. Next time, I’ll leave more time for the icing stage.
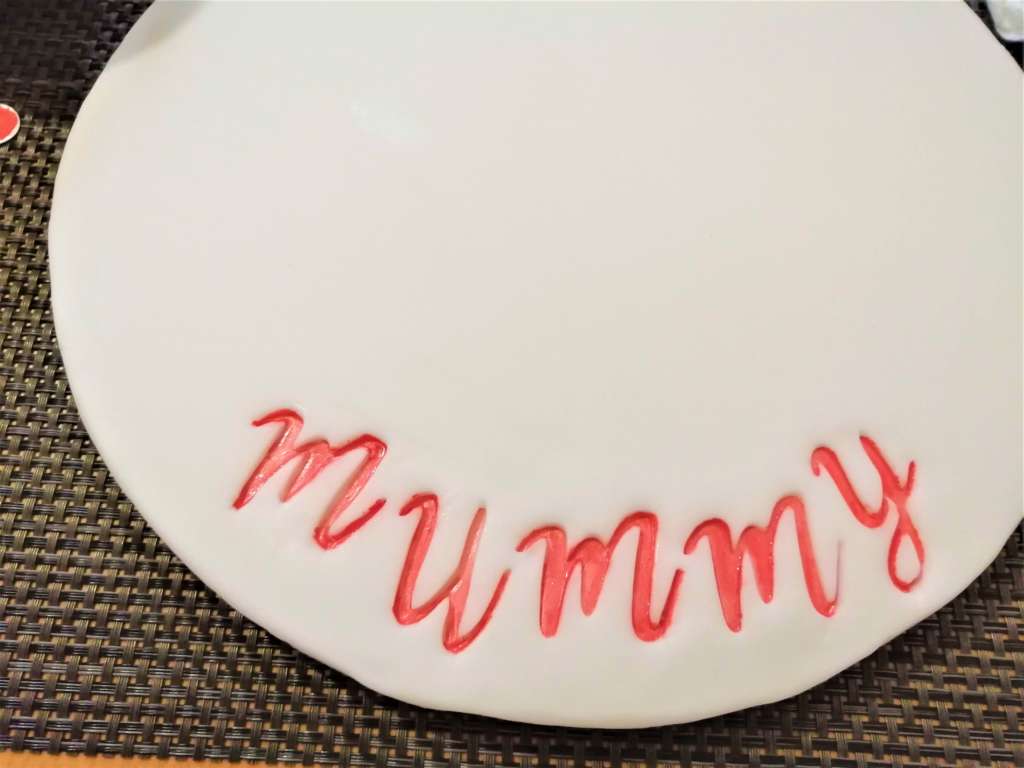
- When decorating, stamp the fondant board 3 days before the big day. It is purely for decoration, and although edible, no one eats the decorative fondant base. You can afford to make it a few days’ earlier as this will help you with time management, as it is one less thing for you to do.
- Set fondant is easier to paint, so I’d recommend doing this in advance. Makes sure you have stack of kitchen roll on the side, and a tiny shot glass of vodka to wipe away any smudges. I used a clean cotton bud dipped in the vodka to wipe away any smudges.
- Now, I don’t as a rule make neat cakes. This is because for the love of God, I can’t ice. I tend to just slap buttercream on, and hope for the best. Here, I had to be more light in hand. I invested in an icing scraper and piping bags – these things are a godsend, and they are now part of my regular baking gear.
- If using fresh cream, fruit or any other highly perishable ingredient with a short shelf life, you need to refrigerate the cake. As my cake creation was buttercream and sponge, I didn’t have to refrigerate it, but I did to elongate the cake’s life, so it could be stored for longer by those who would take it as pack-up.
- If you do refrigerate the cake, give it a few hours to come back to room temperature before cutting, otherwise the sponges will be unyielding.
- You are never going to be entirely happy with your bake. We are our own harshest critics. If you’ve baked only a few times, remind yourself that you are not a professional baker. Stop stressing and enjoy baking.
Here’s what I bought online:
- Amazon: fine paintbrushes, dust spray, ‘Happy Birthday’ cake topper, rose gold balloons
- Aldi: chocolate truffle decorations, mini macarons
- Sugar and Crumbs: raspberry ripple icing sugar, lemon drizzle icing sugar, white chocolate drip bottle in peach sorbet colourway, Amy SweetStamps Elegant letterset.
I loved how the cake turned out in the end. It was worth it to see the birthday girl smile as she cut the cake.
It was my first drip cake, so I’ll be honest – I wasn’t sure how it would turn out. You’ve just gotta have cake erm, I mean faith.
I’ve promised myself to document my baking and cooking adventure more, so if you like my writing style, stay tuned. Please do follow me across social, it would be lovely to see you there and I promise to follow you right back.
